
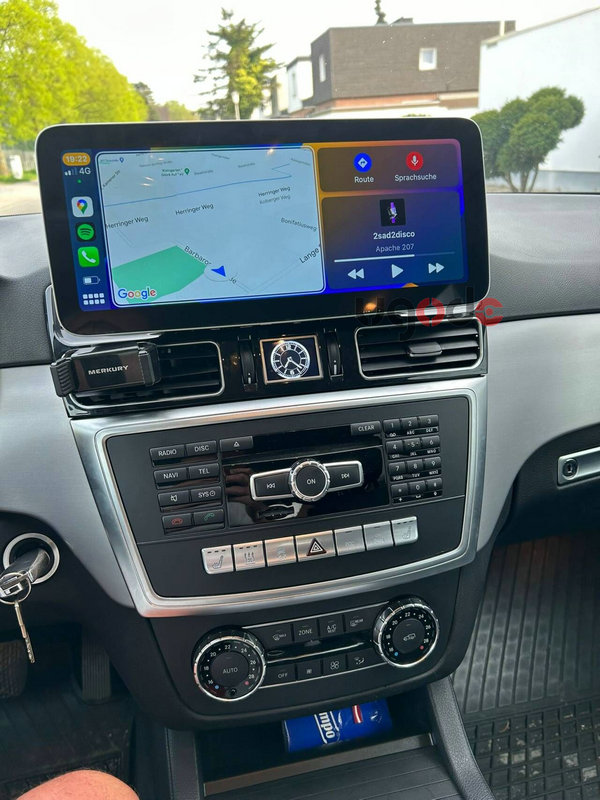
Mercedes-Benz owners are in for a treat as they can now upgrade their vehicles with a new 12.3-inch Android GPS screen on ML models.
With this new screen, drivers will be able to experience a range of exciting features including navigation, entertainment, and even voice control. This upgrade is ideal for those who enjoy the benefits of technology and want to ensure that the interior of their car is as advanced as their smartphone.
The larger screen size makes navigation easier and keeps the driver focused on the road. The Android system can run a range of applications, including music streaming services such as Spotify and Apple Music. Drivers can also easily find directions to any destination using their favorite navigation apps such as Google Maps or Waze.
The 12.3-inch screen is easy to install and can be done at home with just a few basic tools. The process involved removing the existing screen and radio, then installing new hardware in place.
This upgrade is a must-have for any Mercedes-Benz ML owner looking to enhance the driving experience and take full advantage of their car’s technological capabilities.
It’s also a great way to increase the resale value of your vehicle. With the new 12.3-inch Android GPS screen, Mercedes-Benz drivers can now enjoy a whole new level of convenience, as well as a host of exciting features to take their journeys to the next level.
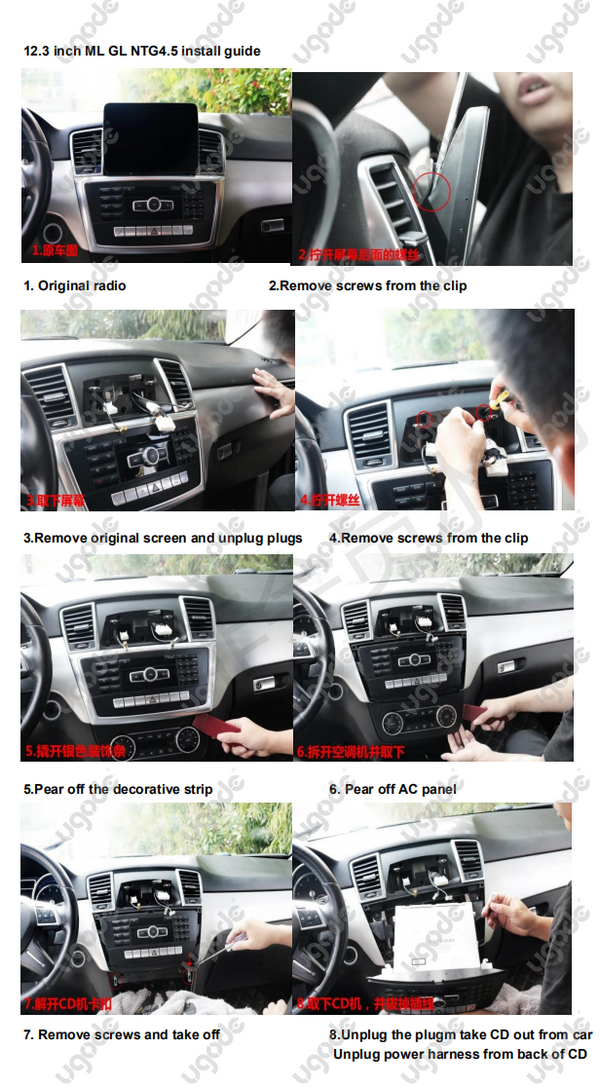
Here are details steps how to install android 12.3inch gps screen in Mercedes Benz ML car for your reference
Here are the revised steps on how to install a 12.3″ Android GPS screen for a Mercedes Benz ML car:
1. Locate the original radio in your car and remove any screws on the clips holding it in place.
2. Remove the original screen and unplug any plugs or cables connected to it.
3. Peel off the trim and AC panel located around the radio and screen.
4. Remove all screws from the clips securing the screen.
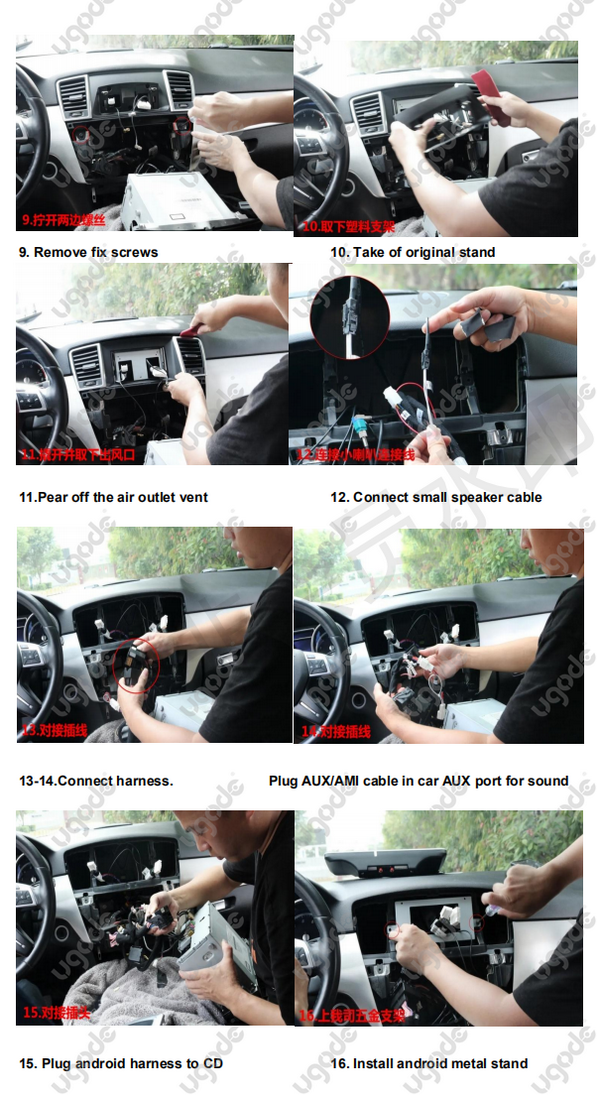
5. Remove the original bracket and all setscrews securing the bracket.
6. Peel off the air outlet and connect the small speaker wire.
7. Connect the wire harness to the Android screen, and plug the AUX/AMI cable into the car’s audio AUX port.
8. Insert the Android harness into the CD slot and install the Android metal bracket.
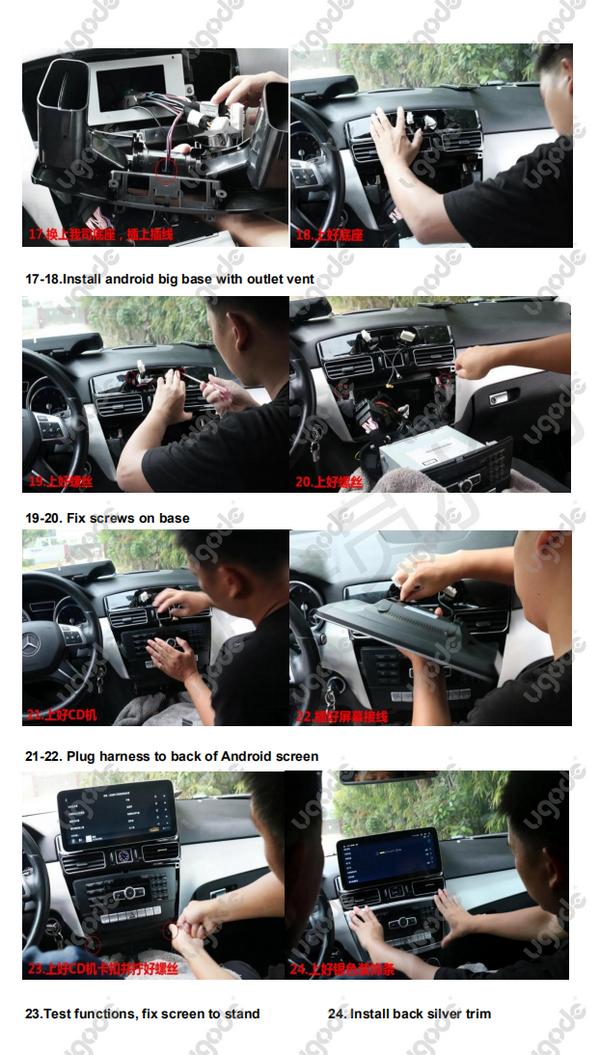
9. Install the large Android base with air outlet and fix it with screws.
10. Plug the wire harness into the back of the Android screen and test all functions.
11. Secure the screen to the stand and install the rear silver trim to complete the installation.
12. Check the appearance of the screen to make sure it fits your car and looks good.
This installation process may vary by car make and model, so if you run into any problems, please refer to your owner’s manual or seek professional assistance.
Post time: May-09-2023